Re-lackering Brass Barrel Lenses
in the Old-fashioned Way
First time I went after a solution for re-lacquering old brass lenses I thought of using what is applied to brass musical instruments nowadays. The results, using an epoxi resin reticulated with melanin, you can find in this page.
After sharing the outcome in a forum dedicated to large format fotography, some people brought up the idea of why not doing it in the old-fashioned way. First it would be more authentic and second it would yield the "golden" hue that is part of the beauty in those lenses. Luckly enough, some guys had references or even previous experience in lacquering brass using a varnish based on shellac.
In this page I want to share what I could build upon those leads and advices. You can read the complete thread at DIY re-lacquering brass lenses
I would like to thank the experts there in the Large Format Photography forum, for I confess that I am happier with the results I got now, than the ones with epoxi resin.
Some considerations apply again to this method: |
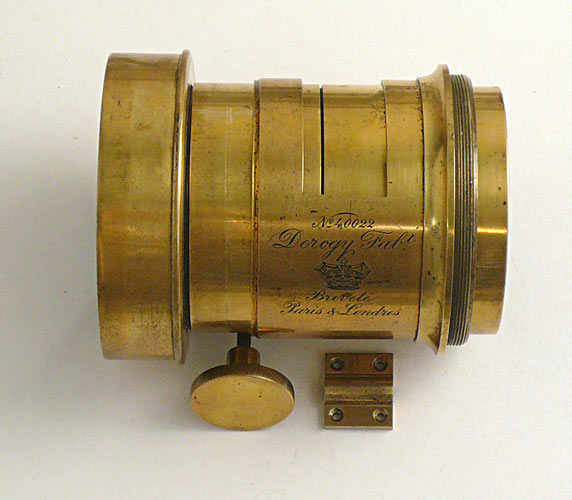
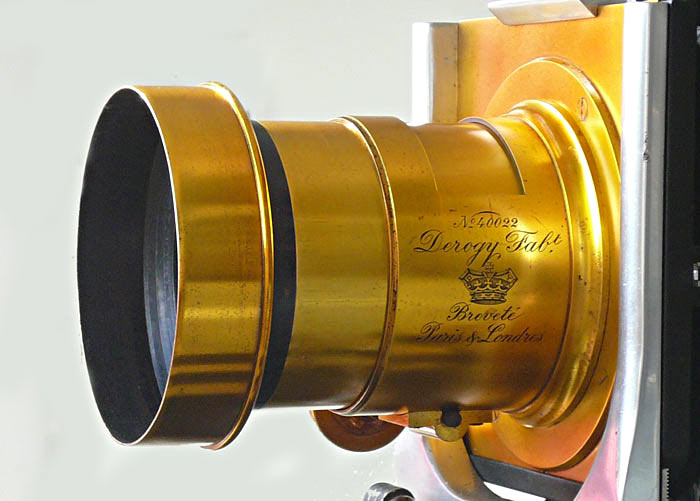
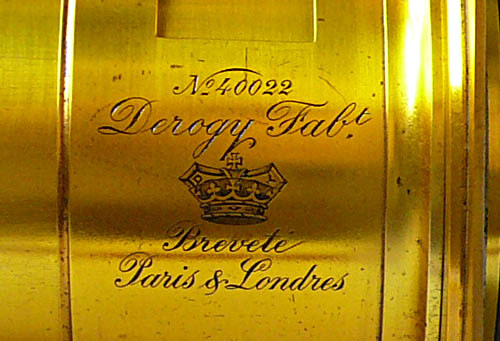
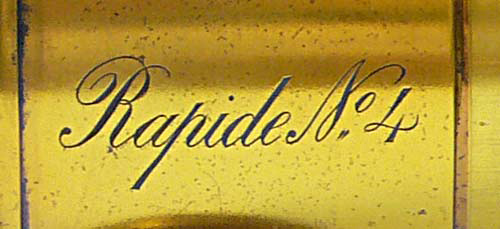
This time I used an old Derogy lens. One that is a Petzval type. I bought it last year (2008) in Bievres. It was recently polished and without any sign of original lacquer. After one year the brass presented already some oxidation.
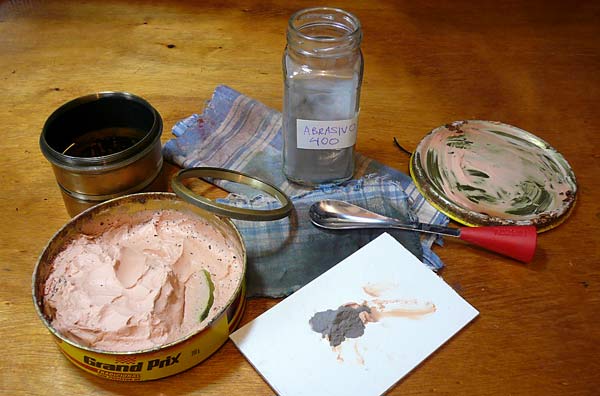
I polished it again using the usual mix of car wax and abrasive grade 400. It is applied with a thick cloth. It quickly brings back a shiny naked metal surface. The kind you don't feel like touching, because you know it will accelerate corrosion and fingerprint stains.
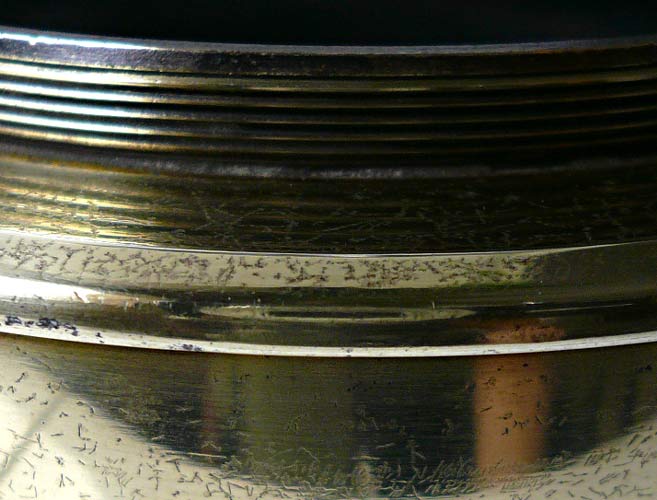
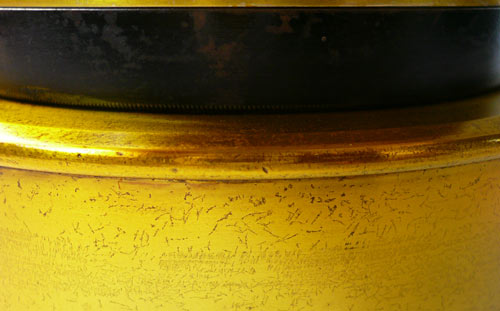
This is a close up on the lens shade. It is important to note that a lens at that age will probably show some "engravings" quite deep. Those were probably flaws in the previous lacquer that opened the access to air and other corrosive substances. I do not polish hard enough to get rid of those. That would mean the removal of too much material and risk of losing the original shape.
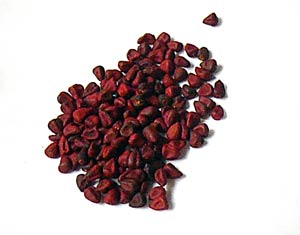
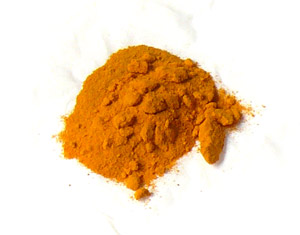
Now comes the lacquer. I used two colorant agents: annatto and turmeric. Both are natural and used for food. Annatto is from my home country Brazil, where it is known as Urucum, I bought some seeds in a Macumba/Umbanda shop. They normaly carry a large variety of spices, colorants and roots among religious stuff. The seeds are, hard, dark brown, covered with a deep red powder. Maybe it is possible to find only the powder. The turmeric I had in house. It is known as Curcuma over here. The shellac I found in a wood works store. It is from India. I know there are different shades of shellac and the one I bought is not very much clear. But, as the idea was about getting some 'tanning' in that old lens, I did not bother about it.
 |
 |
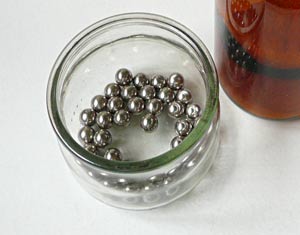 |
| Annato (Urucum in Brazil) | Turmeric (Curcuma in Brazil) | Spheres for mixing |
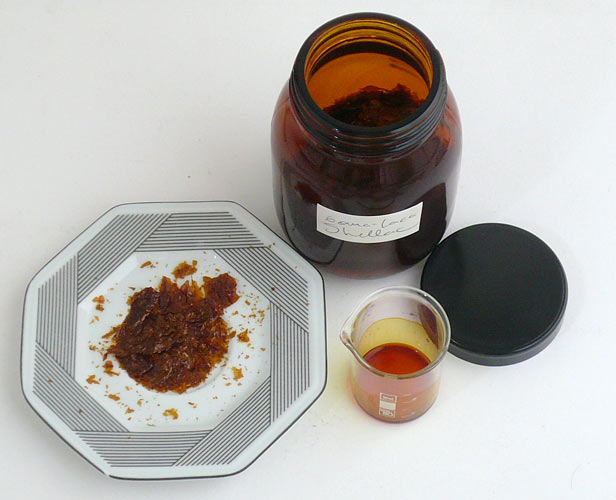
Shellac from India and the prepared lacquer where you can see the hue against a white background.
 |
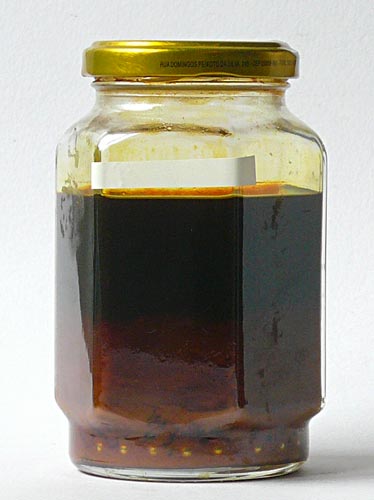 |
| Device for mixing. It turns aprox 50 times/minute | Prepared lacquer.The picture above is how it looked like after settling for one week. The upper half was clear and that is the part I used. I think today that the turmeric was too much coarse. Maybe with a finer powder I would not get so much deposit. |
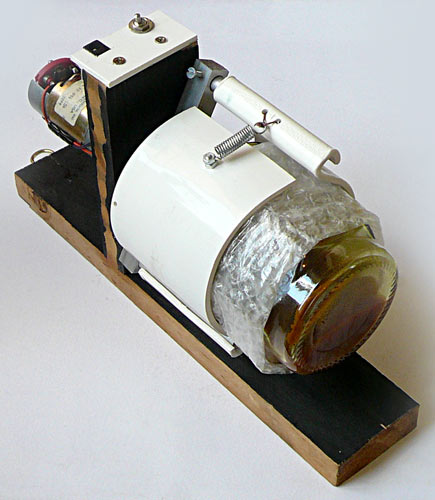
For mixing I added 25g of Turmeric and 25g of Annatto to 250 ml of Alcohol 99.3%. Put it all in a device I use for fixing roll film (the picture is self explanatory) Using a glass with six faces and some metal spheres inside, I let is spinning for good five hours. Then I added 40g of shellac and let is turning for 5 hours more. That is overkill, but OK, I had this shaker at hand so I did it this way.
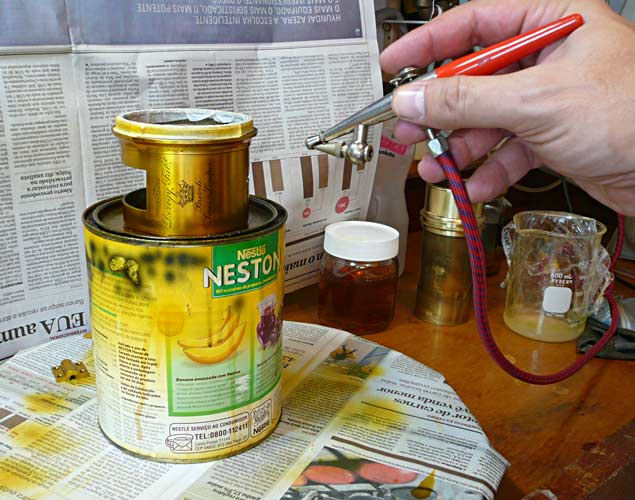
To apply, the instruction I received in the forum was: heat up the brass pieces and dip than in lacquer or use a camel brush to paint with it. But, dipping did not apply to the geometry of that lens and I had a hard time with the brush. I was not able to produce an even surface. So I decided air brushing and that was fine.
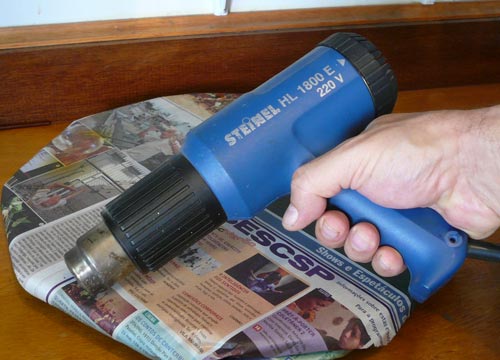
One more licence or adaptation over the traditional method: I heat up the parts aftewards with a blower. I decided doing so because the surface was too much opaque. I figure that the droplets of lacquer were arriving almost dryed to the lens barrel. Then I took a blower at the temperature of some 250/300 Celcius and applyed this hot air for 1 or 2 minutes right after the airbrush. I could see the surface getting shinier and a certains smell building up coming from the lacquer. I believe it melted a little bit and also believe that it may help to stick better to the brass in this way.
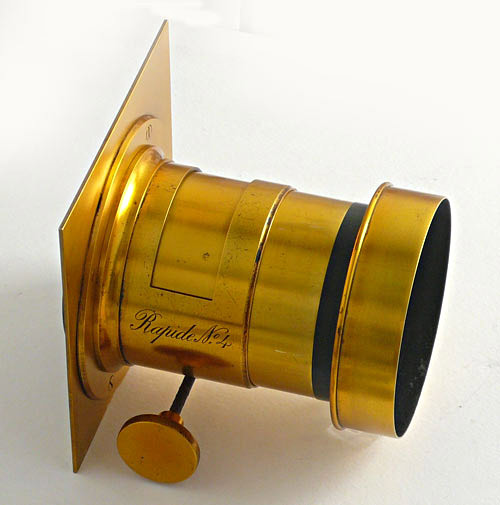
Now some close-ups. It is clear that the lens does not look like brand new. Signs of age are there. Many small or bigger flaws show up under the lacquer layer. But it is now better protected. To my taste it also looks nicer in aesthetic terms compared to what it was when I bought it.

Comparing to the epoxi finish, in absolute terms, I think both have its virtues and values, but the amber shade provided by the traditional lacquer looks more classic.
Well that is it. Now I wish this little nice piece of glass and brass, at least, 150 years more.
